Autogenerate Changelog via Jira and Slack (+Fastlane)
Save time and increase accuracy when releasing a build.
 Hello, and welcome to my latest Medium article, where I will show you how to use Jira and Slack to automate the writing and sending of changelogs, tagging, and status changes for relevant tasks on the Jira board when releasing a build. This automation will use Fastlane as an example, which I’m using for iOS, but most settings will be universal for any platform.
Jira Automation Creation
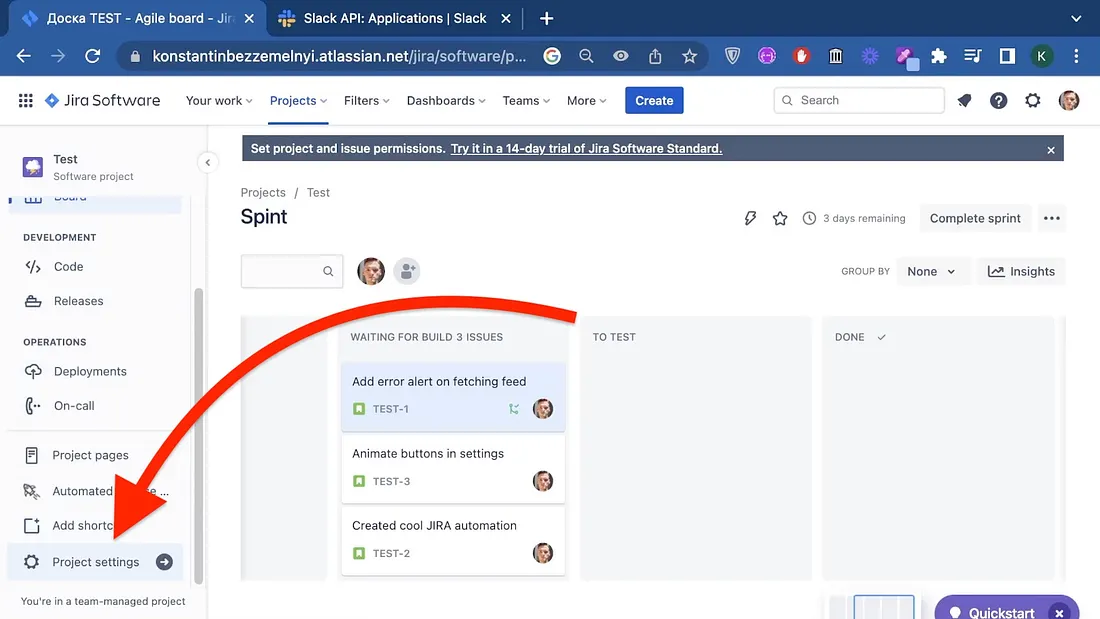
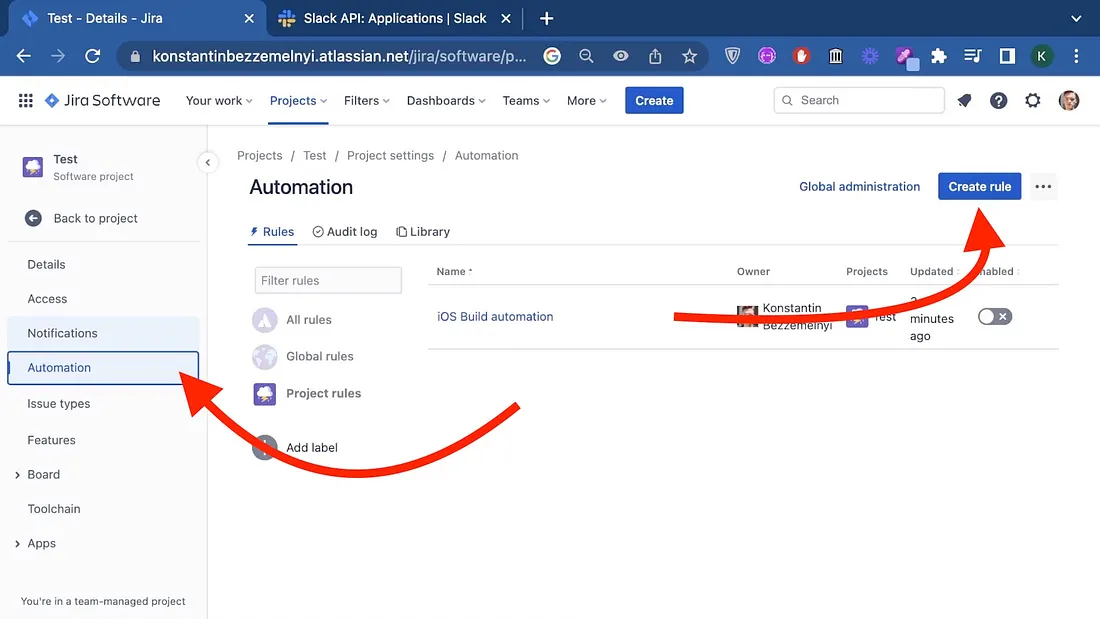
First, go to the project settings tab and select “Automation.” This is where we’ll create a new rule.
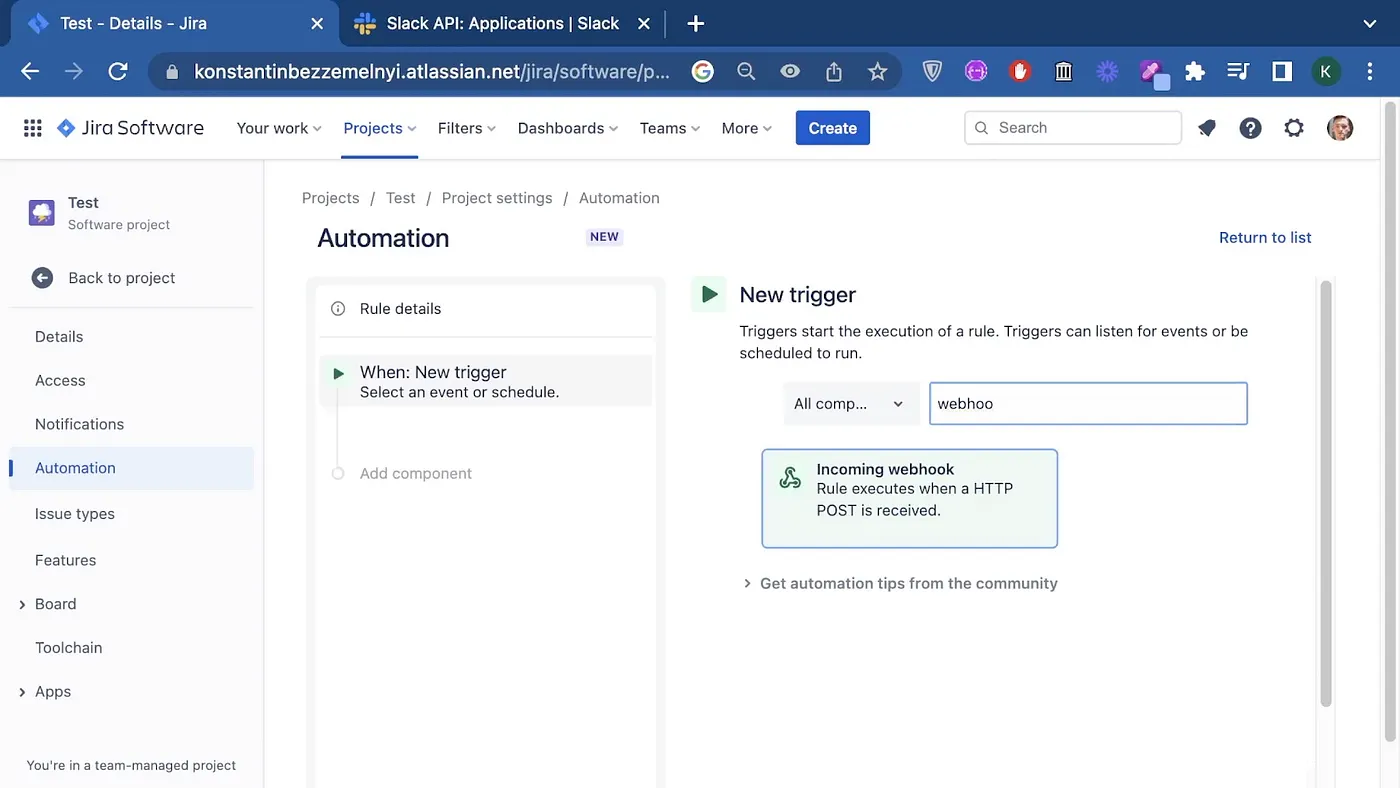
 The trigger for our new rule will be the Incoming webhook. The trigger for this automation will be a POST request, which we will later attach to the end of the build delivery process.
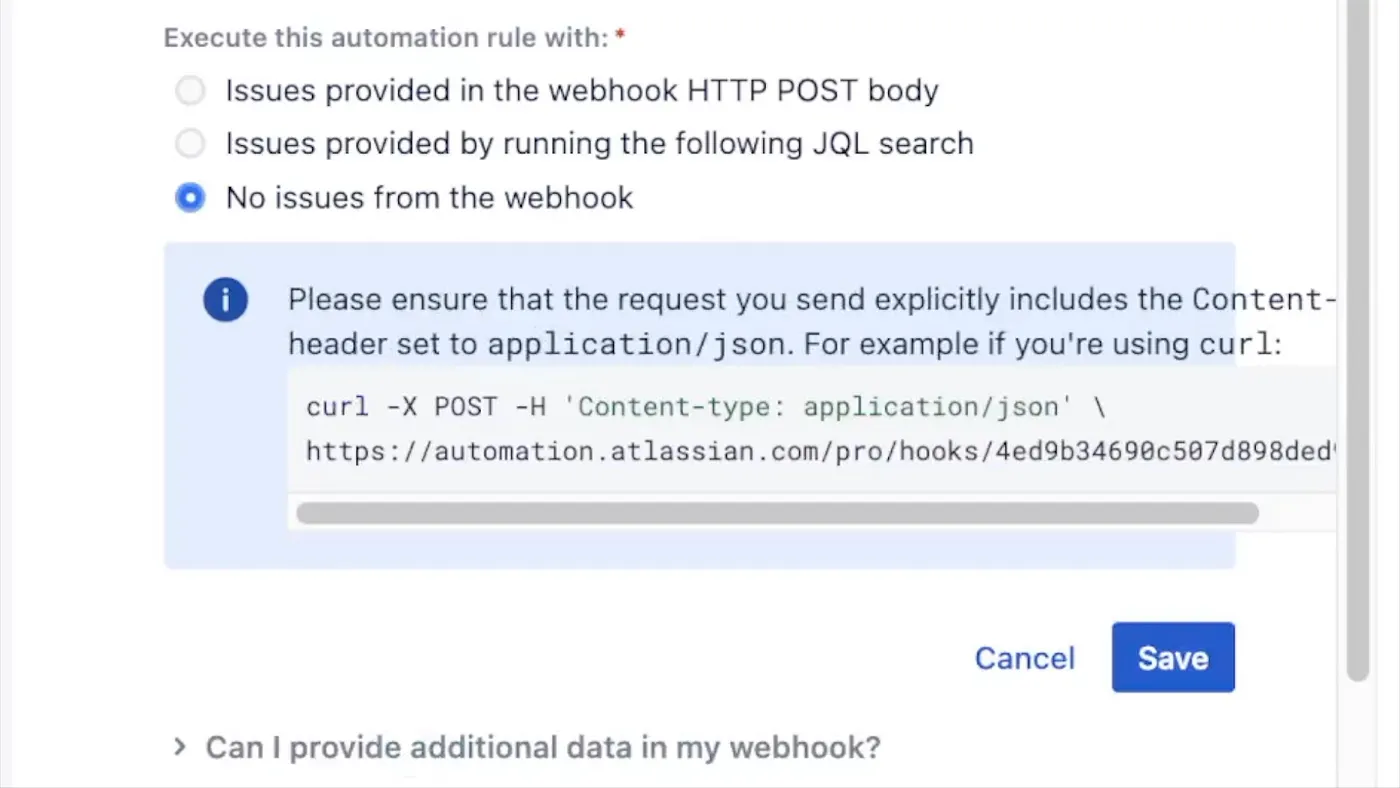
 Next, we select “No Issues from webhook” since we will receive the tasks directly from Jira. We can immediately see an example of a request that this rule will expect, but we’ll return to it later. Save the component.
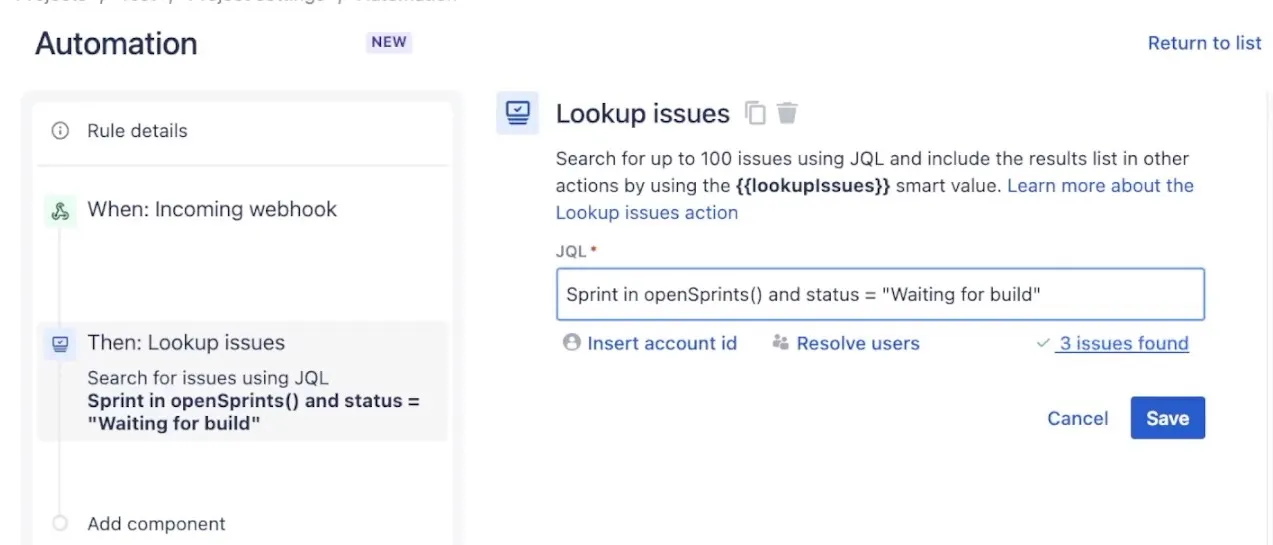
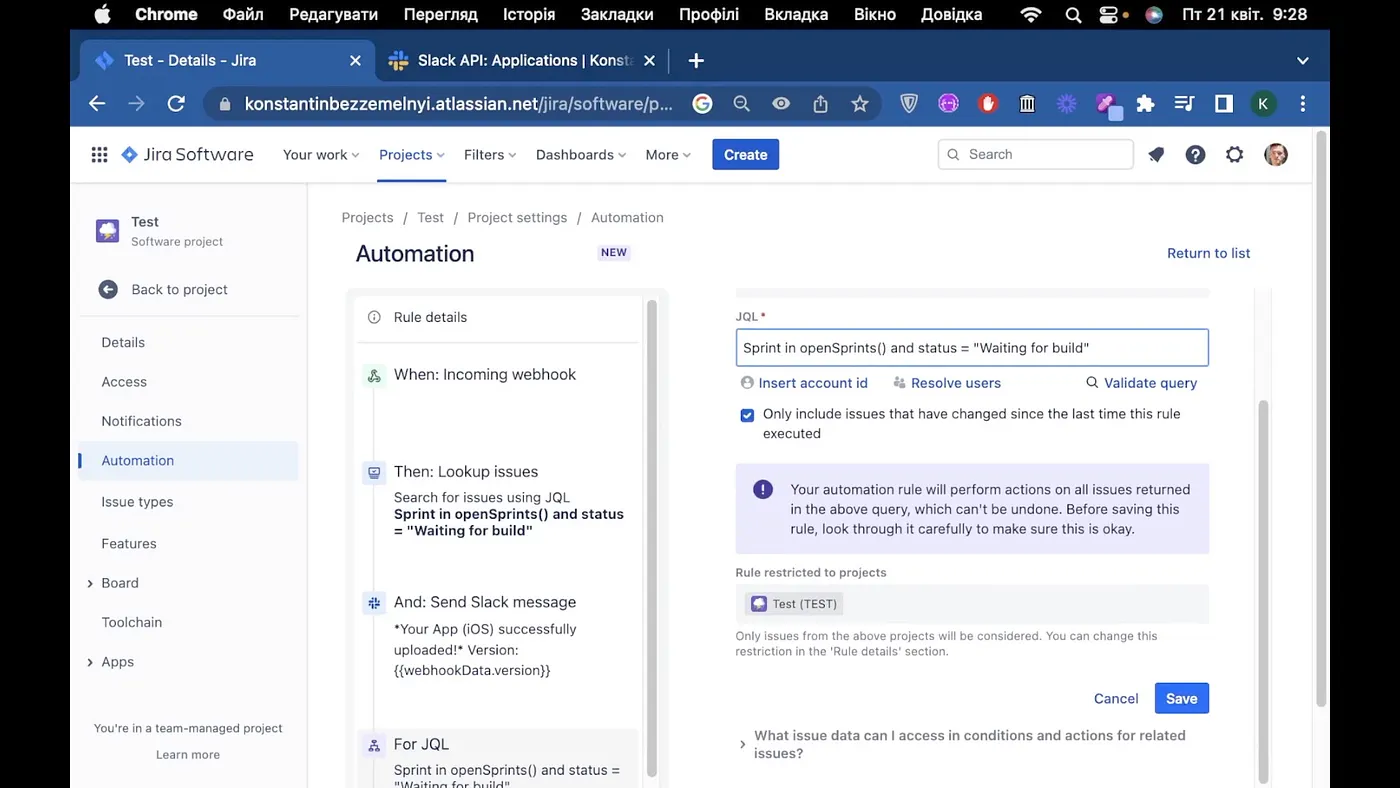
 Next, we add the “Lookup for issues” component action to search for issues on the board in the current sprint with the “Waiting for build” status.
We write the query according to the way Jira Query Language perceives it.
We can also validate the query using the “Validate Query” button. And we see that the command is working successfully. Save it and move on to the next step.
Next, we add the “Lookup for issues” component action to search for issues on the board in the current sprint with the “Waiting for build” status.
We write the query according to the way Jira Query Language perceives it.
We can also validate the query using the “Validate Query” button. And we see that the command is working successfully. Save it and move on to the next step.
Slack Integration
We’ll send a message with the changelog to Slack. Here we need the webhook URL from Slack and the message.
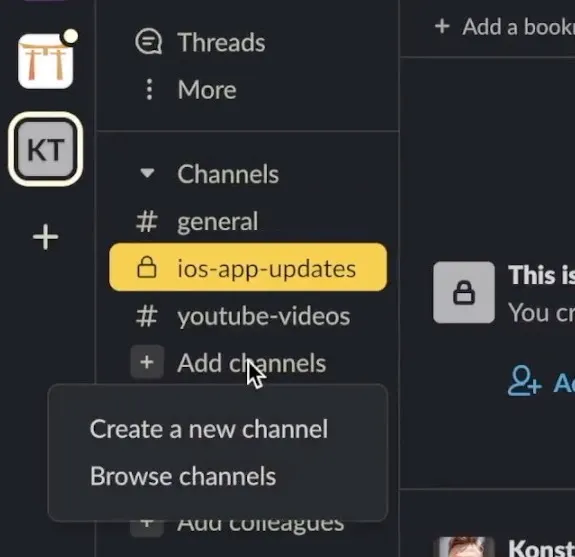
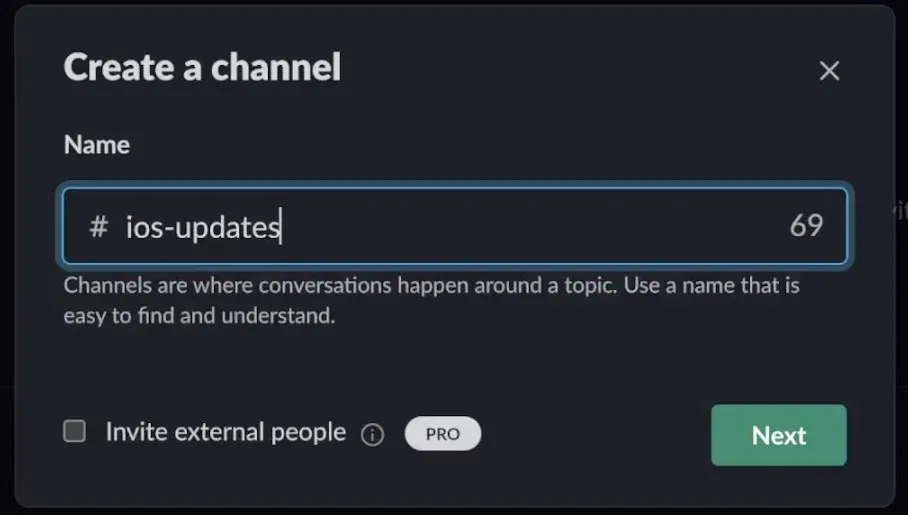
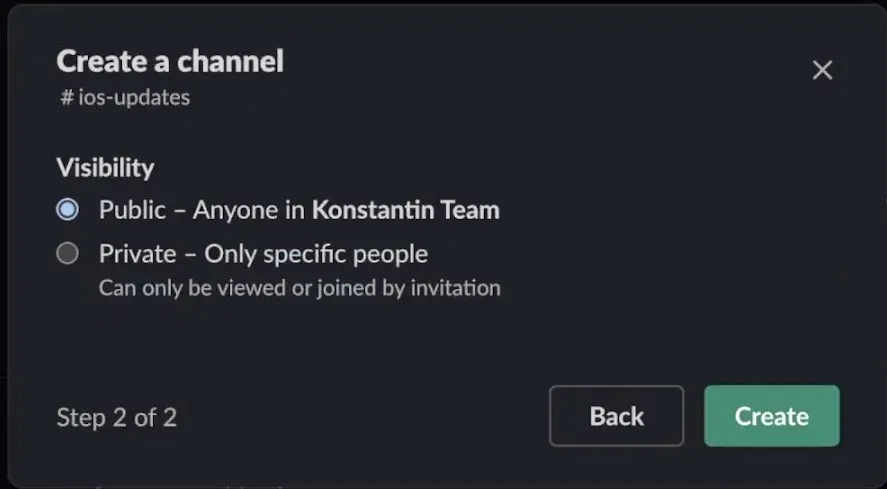
 Let’s start with the webhook. To get it, first go to Slack. Here you need to choose a name and type of access at your discretion.
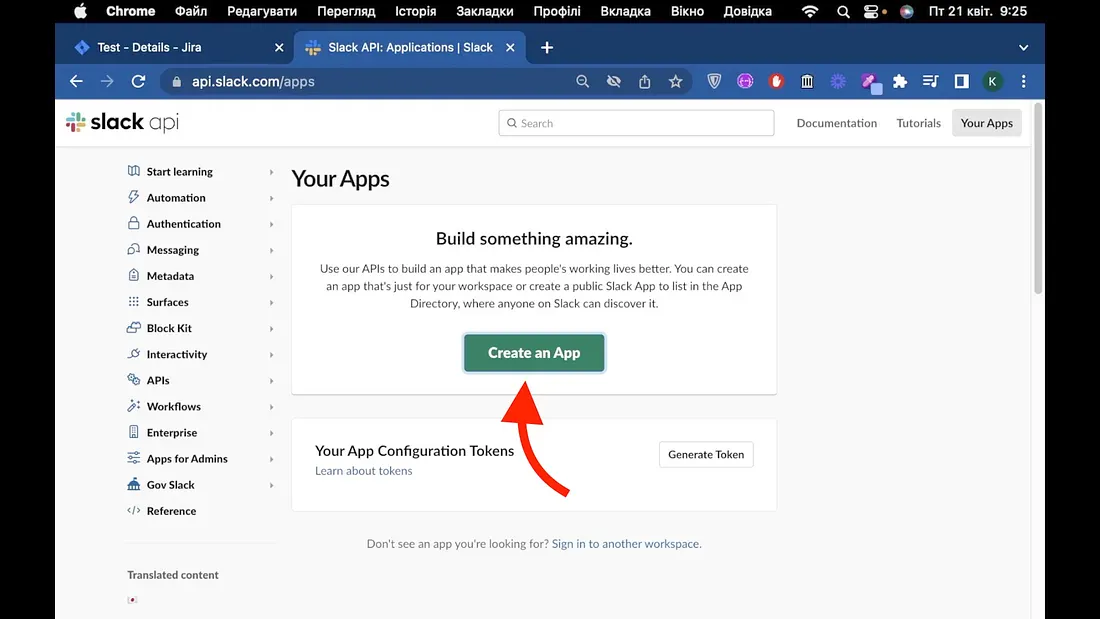
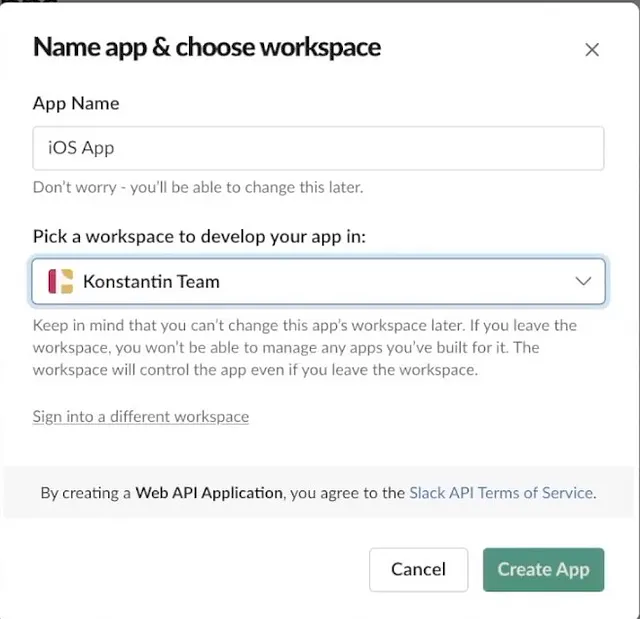
 After that, go to slack apps api and add a new Slack app. From scratch. Choose a name and workspace. And click Create.

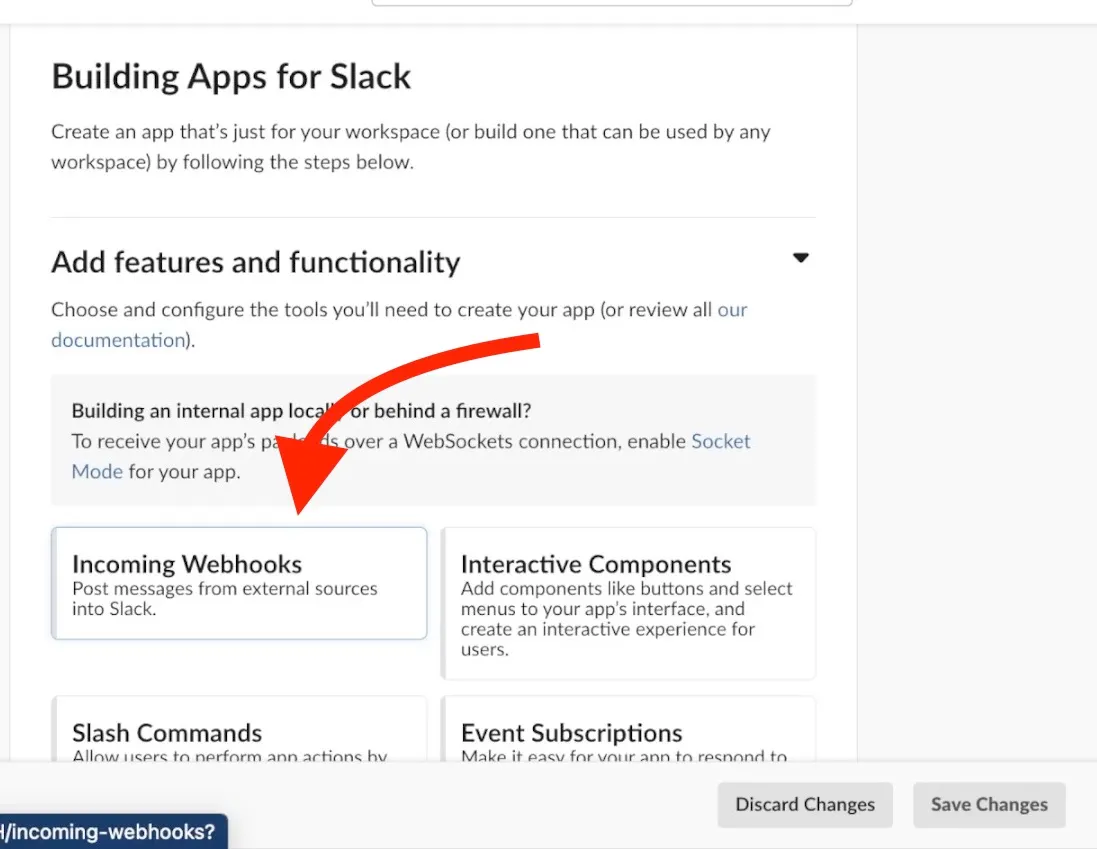
 On the next page, select “Incoming webhooks” and click Activate.
 And at the bottom of the page, add the Webhook to our Workspace. Select the channel you created and click on Allow.

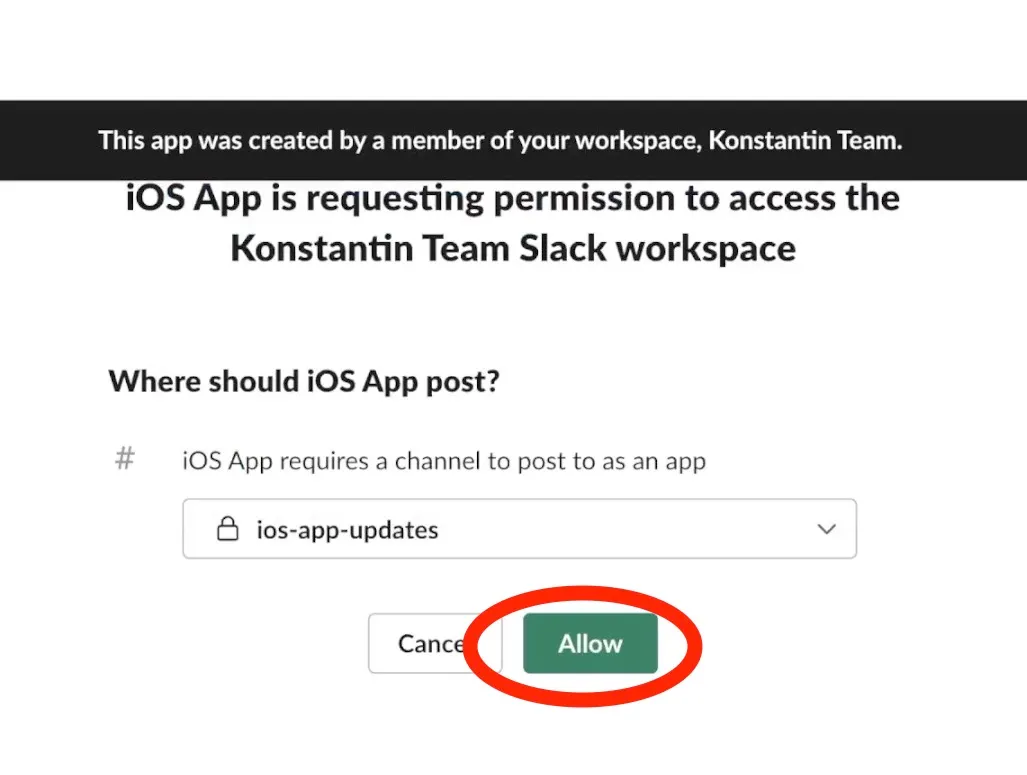 The Webhook has been successfully created.
Continue the Creation of Jira Automation Rule
Now, copy and paste it into the automation component in Jira. This way, the message will be sent to this channel.
In the message field, I’ll copy the ready-made changelog template. In addition to the header that this is our app’s changelog, we also display the version information that comes to us from the Jira POST request.
Below that, for each of the found tags, we display its fields: summary, key, and reference in Jira and its creator.

Save the step, and go to the last one.
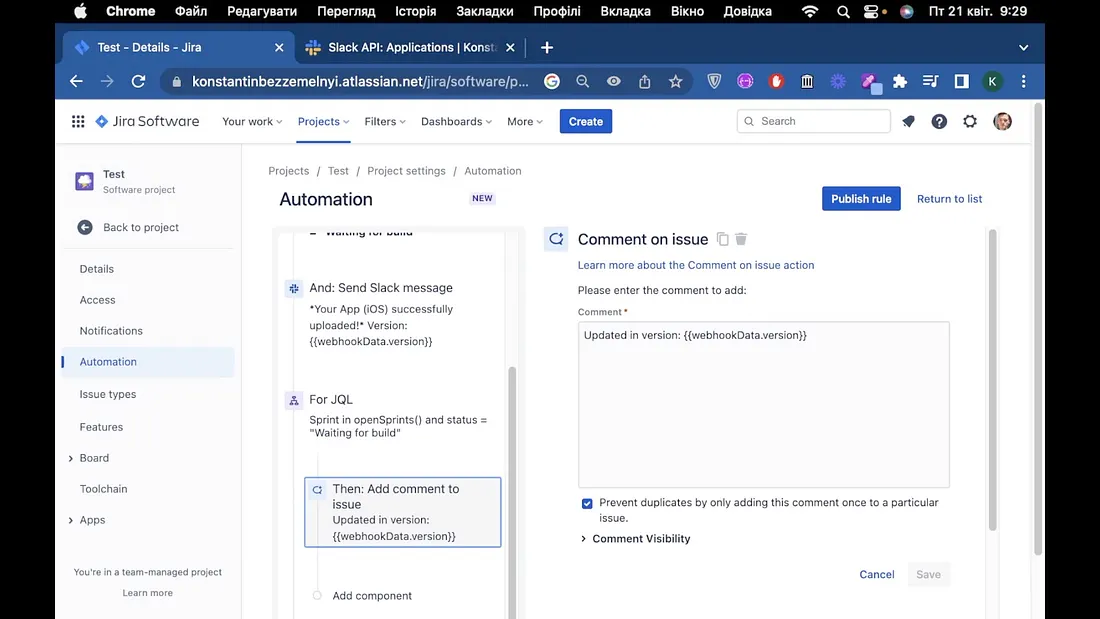
Let’s add another component that will repeat the JQL query and perform the same tasks.
 For each one, we’ll comment on the status update (and substitute the version from the webhook).
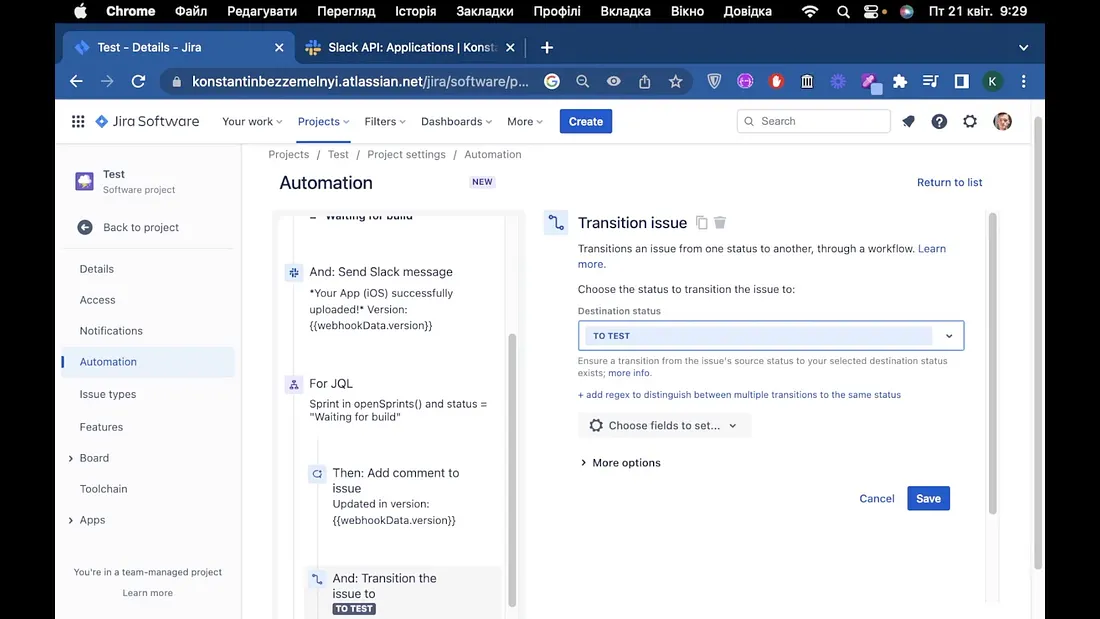
Save this automation and name it “iOS App Waiting For Build -> QA Automation.” Let’s enable it.

Testing Automation
To run this rule, copy the POST request.
So far, we see everything unchanged on the board.
In the terminal, paste the copied code from Jira. Pass an object with data as the data parameter, including the version to which you update your application.
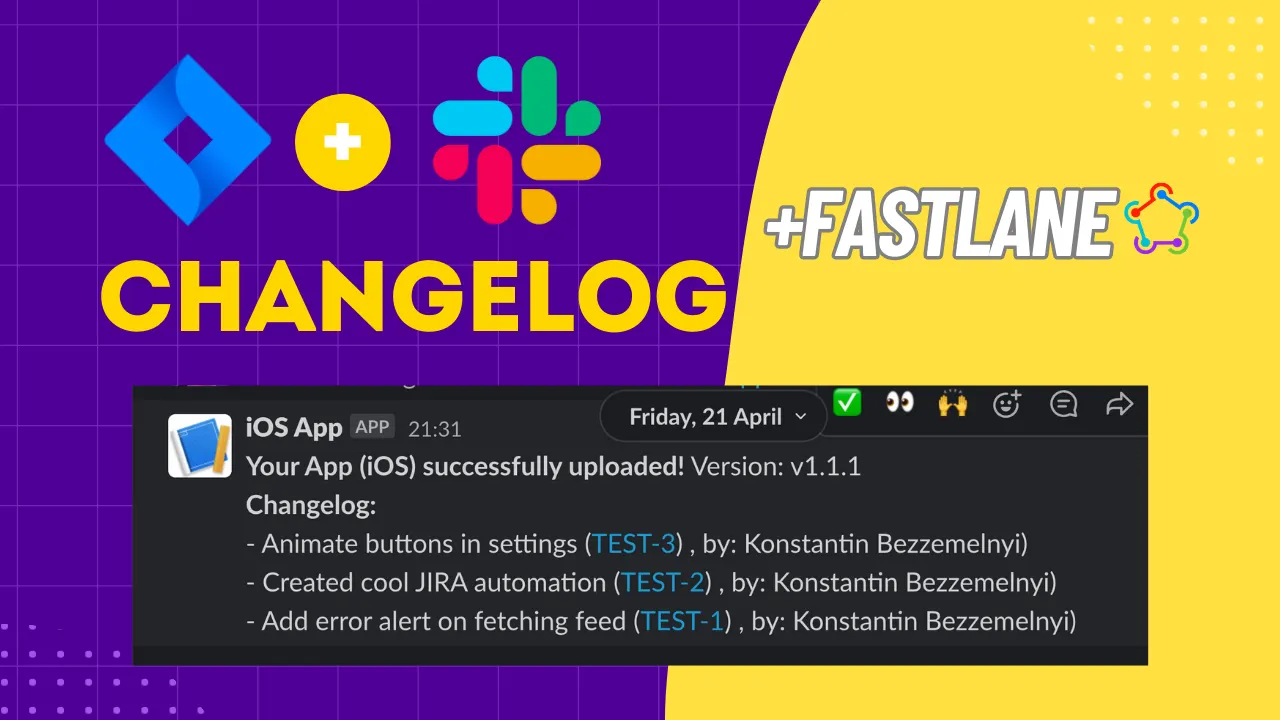
After clicking on the button, we see a new message in Slack. It says that the build has been successfully updated, a changelog, and contains the name of each task, its clickable code with a link to the gif, and the performer. A comment is also left for the task. If you look at the current state of the board, you’ll see that the status has been updated for all the tasks as we described in the automation.
Fastlane Integration
And now, I will show you how to connect this automation using the example of Fastlane.
From paragraph 1.1 of my article about Fastlane integration, copy the code that sends the build to the testflight.
Paste it into the VS code. We also add the code that makes a post request for a webhook from Jira. It passes the version, builds the number, and builds data as the request data. Check the beginning and the end of the adjusted code:
ruby# fastlane/Fastfile
# Remove if you do not want to check for updates and update fastlane tools each time when running commands
update_fastlane

# Make sure to import these, so post request to Jira can be made
require 'uri'
require 'net/http'
require 'json'

# Set the default platform for running lanes
default_platform(:ios)

lane :beta_build do
  begin

    # Uses automatic code-signing
    update_code_signing_settings(
      use_automatic_signing: true,
      path: "Project Name.xcodeproj"
    )

    # Get the build number
    build_number = latest_testflight_build_number + 1

    # Increment the build number
    increment_build_number({
        build_number: build_number
    })

    #Insert your project name here
    build_app(workspace: "Project Name.xcworkspace")

    # Upload to TestFlight
    testflight(
      skip_submission: true
    )

    # Clean folders
    clean_build_artifacts

    # Adds a tag named "fastlane-builds/beta_build/n", where n equals the build_number
    add_git_tag(
      grouping: "fastlane-builds",
      includes_lane: true,
      build_number: build_number
    )

    # Remove if you want to push changes manually
    push_to_git_remote


    # Send POST request with data using Jira webhook
    uri = URI('https://automation.atlassian.com/pro/hooks/80bbaf818acb1c024ae9ecb26674c4420addd713')
    http = Net::HTTP.new(uri.host, uri.port)
    http.use_ssl = true
    headers = { 'Content-Type' => 'application/json' }
    data = {
      'data' => {
        'version' => "v#{get_version_number}",
        'buildNumber' => latest_testflight_build_number,
        'buildDate' => Time.new.strftime("%Y/%m/%d %T"),
      }
    }
    request = Net::HTTP::Post.new(uri, headers)
    request.body = data.to_json

    response = http.request(request)


end
Now these fields from the request data can be used in automation. To run this lane, use fastlane beta_build from the command line as before.
Conclusion
In this article, I showed you how to automate the process of writing and sending changelogs, tagging, and updating statuses in Jira using Fastlane, Jira, and Slack. This automation will save you time and increase accuracy when releasing a build.
Thank you for taking the time to read my article on iOS Jira and Slack automation. I hope the information has helped streamline your workflow and increase productivity.
Until next time, happy automating!